From remix link to a restaurant website that fills tables
Braise is a website for a restaurant: the menu with allergen filters, opening hours that know when you're open, table requests that follow those hours, a tasting menu with wine pairing, private events and gift vouchers. This guide takes you from your remix link to your own live site. You do not need to write code.
Framer in 5 minutes
| Word | What it means |
|---|---|
| Project | Your website. The remix link puts a copy of Braise in your Framer account. |
| Pages (left panel) | The list of pages. Click one to open it. |
| Sections | Each page is a stack of full-width sections: header, hero, menu, tasting menu, footer and so on. Click one on the canvas to select it. |
| Properties (right panel) | The settings of the selected section: texts, photos, lists, links, background shade and the Effect switch. |
| Breakpoints | Each page has Desktop, Tablet and Phone versions. The sections adapt by themselves; change a text on Desktop and check it on Phone. |
| Settings (top-left menu) | Site title, favicon, domain, page SEO, and Code, where the Braise settings script lives. |
| Publish (top right) | Puts your changes live. Nothing changes on the live site until you publish. |
Get your copy
- Log in to Framer, or create a free account.
- Open your remix link from the order confirmation page or email.
- Choose a workspace if Framer asks. The whole template is copied into your account.
- Rename the project to your restaurant's name (click the name at the top of the editor).
Your first afternoon
- Your menu and opening hours in one Google Sheet, then paste the two links in the settings script. 30 to 60 minutes. The menu, filters, tasting menu, print menu, "open now", hours and booking times all follow.
- Name, logo, colours and fonts, 15 minutes.
- Table requests by email: one free key, 5 minutes.
- The plate in the hero and your photos, page by page.
- Locations, tasting menu prices, private dining rooms, gift vouchers.
- SEO, legal pages, the checklist, and publish.
The settings script
Everything that applies to the whole site is set once, in one place.
- Open Settings > Code.
- Click Braise settings (edit me).
- Change the values you need. Keep the quotes, commas and semicolons.
- Click Save, then Publish.
window.BRAISE = {
  menuCsv: "",        // link to the Menu tab, published as CSV
  hoursCsv: "",       // link to the Hours tab, published as CSV
  web3formsKey: "",   // free key: requests arrive in your inbox
  timeZone: "Europe/Copenhagen",  // for "open now"
  currency: "EUR",
  locale: "en-GB",
  effects: true,      // false = every section stays still
  cursorHints: true,  // false = no "Drag" / "Scroll" cursors
};Name, logo, colours and fonts
Name and logo
Select the Site Header on any page: change Logo text, or upload a Logo image (SVG or PNG with a transparent background, light colour) and set its height. Do the same in the Site Footer. The Print Menu page takes a dark logo for the white paper.
Colours
In the settings script, under :root. The five --br- shades (deep, dark, page, raised, light) are the backgrounds; every section has a Background option to pick one. Give neighbouring sections different shades.
Fonts
Braise uses Zodiak for titles and Author for text. To use your own: add the font in Framer (any text layer, font menu, so it gets loaded on the site), then uncomment and change --br-display and --br-text in the settings script.
Your menu and opening hours
One Google Sheet runs the menu, the filters, the tasting menu, the printable menu, "open now", the hours shown everywhere and the times guests can book. Change a price or close for a holiday in the sheet and the site follows within minutes, without publishing.
- Make a Google Sheet with two tabs: Menu and Hours. Start from the example files: braise-menu.csv and braise-hours.csv. In Google Sheets: File > Import > Upload, one per tab.
- File > Share > Publish to web. Choose the Menu tab and Comma-separated values (.csv). Publish and copy the link.
- Do the same for the Hours tab.
- Paste the links in the settings script (
menuCsv,hoursCsv) and publish.
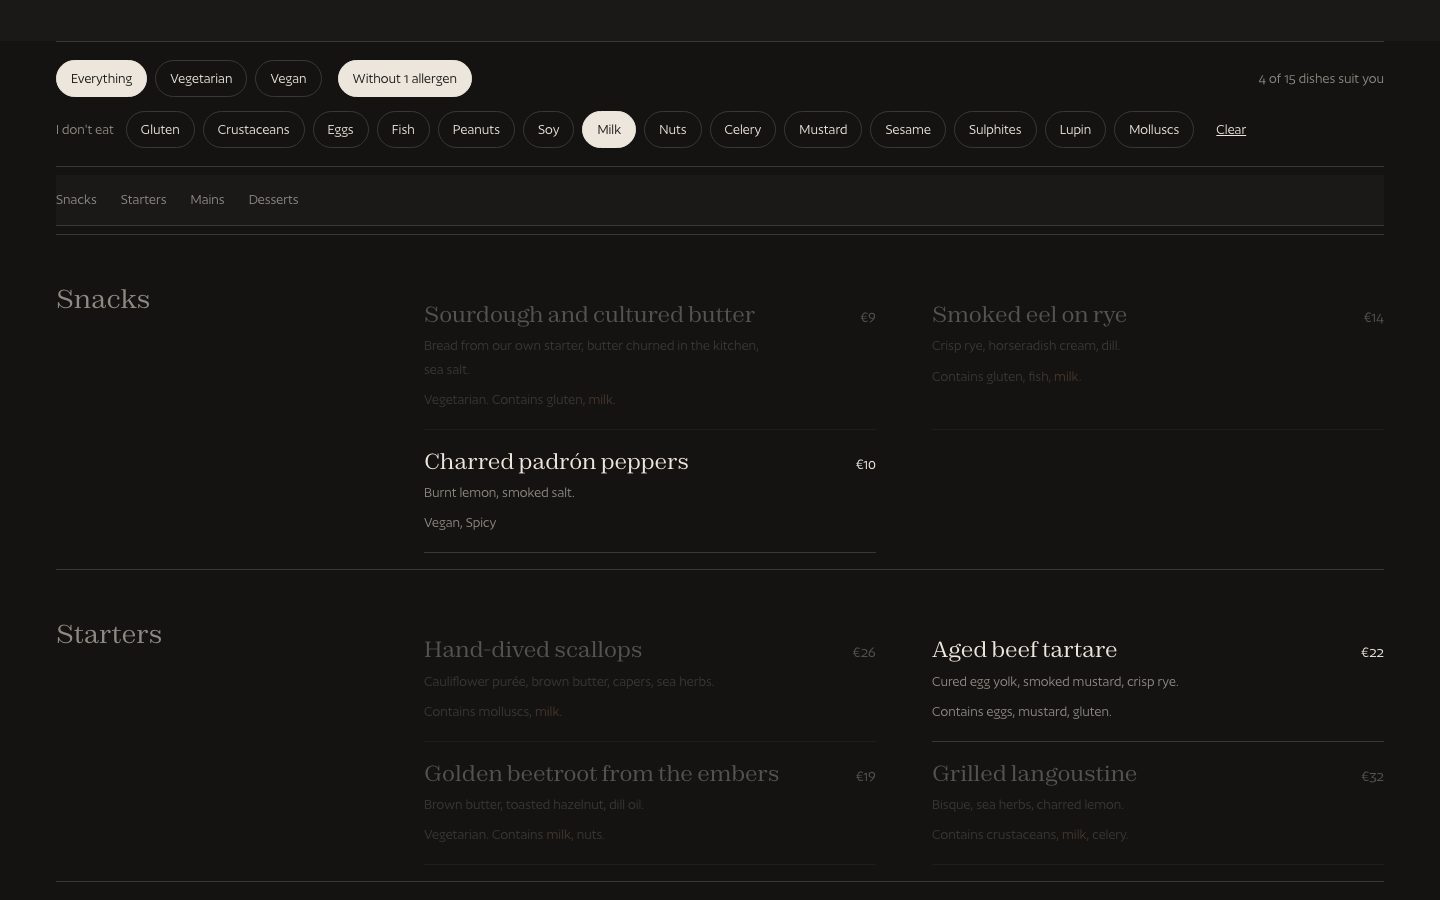
Menu tab
| Column | What to write |
|---|---|
| section | Snacks, Starters, Mains… Sections appear in the order of their first dish. |
| name, description, price | The dish. Price as a number: 26 or 26.50. |
| allergens | Any of: gluten, crustaceans, eggs, fish, peanuts, soy, milk, nuts, celery, mustard, sesame, sulphites, lupin, molluscs. Comma separated. |
| diet | vegetarian, vegan, spicy. |
| image | Optional link to a photo of the dish. |
| course, wine | A number puts the dish on the tasting menu in that order; wine is its pairing. |
| location | Empty = every location. Or the location's name, for a dish served only there. |
| available | "no" hides the dish (sold out, out of season) without deleting the row. |
Hours tab
| Column | What to write |
|---|---|
| location | The location's name, as in the Locations section. With one location you can leave it empty. |
| day | mon, tue, wed, thu, fri, sat, sun, or a date like 2026-12-24 for a special day. A date wins over its weekday. |
| open, close | 17:30 and 23:00. Empty open = closed that day. Closing earlier than opening (18:00 to 01:00) means after midnight. |
| note | Optional: Lunch, Dinner, "New Year's Eve menu", "Closed for a private event". |
The plate in the hero
The home page opens with one dish seen from above. It turns as visitors scroll and embers rise from the bottom of the screen.
- Use a square photo taken from directly above, with the plate in the middle and dark space around it.
- Select the Plate Hero section and upload it in Plate photo. That's enough: the whole photo turns.
- Optional, for the finest effect: cut out just the food with any free background remover, crop it to a circle around the centre of the photo, and upload it as Food cut-out. Then only the food turns and the light on the plate stays still. Adjust Cut-out size until it sits exactly on the plate.
Turn sets how far it rotates, Embers how many sparks (0 = none), Effect off keeps it still.
Photos
Click a section and replace each photo in the right panel. Dish photos for the Menu, Menu Spotlight and Tasting Timeline are matched by dish name (Dish photos), or come from the sheet's image column.
- Dark, low-key photos look best: one light source, dark table, dark plates.
- Dishes: 4:5 or square, about 1600 px. Rooms: 3:2, about 2400 px wide.
- All demo photos are AI-generated for a fictional restaurant; replace them before you launch.
Pages and sections
Every section is independent: add, remove or reorder them on any page. Each has a Background shade and, where it moves, an Effect switch.
| Section | What it does |
|---|---|
| Site Header | Links, live "open now", booking button, logo text or image. |
| Plate Hero | A dish from above that turns on scroll; embers rise and move away from the cursor. |
| Chef Note | A quote whose words light up as you scroll, with a portrait. |
| Menu Spotlight | Signature dishes as big names; the photo takes half the screen. |
| Menu | The whole menu with diet and allergen filters, section links, print button. |
| Zoom Image | A small framed photo grows to fill the screen. |
| Tasting Timeline | The evening on one line: drag to see each course, its time and wine; price for the table. |
| Doors Reveal | A photo opens like two doors on a message and facts. |
| Feature, Slit Image | Photo with text and facts; photo opening from a slit, with caption. |
| Locations | Live open/closed, week hours, special days, address, map, directions. |
| Reservation | Table requests that follow your hours. |
| Event Enquiry | Rooms, guests, budget and minimum spend. |
| Gift Voucher | A voucher that guests design and see live. |
| Call To Action | Firelight photo band with booking button and embers. |
| Print Menu, FAQ, Legal Text, Site Footer | A4 menu with QR code; questions; legal pages; address, live hours and links. |
effects: false in the settings script for the whole site. Visitors who ask their device for reduced motion get still sections automatically.Tasting menu
Courses come from the sheet (column course). In the Tasting Timeline section set Price, Wine pairing, First course at and Minutes per course: the times on the line of the evening are calculated from these. The booking button pre-fills the reservation with the tasting menu, the number of guests and the pairing.
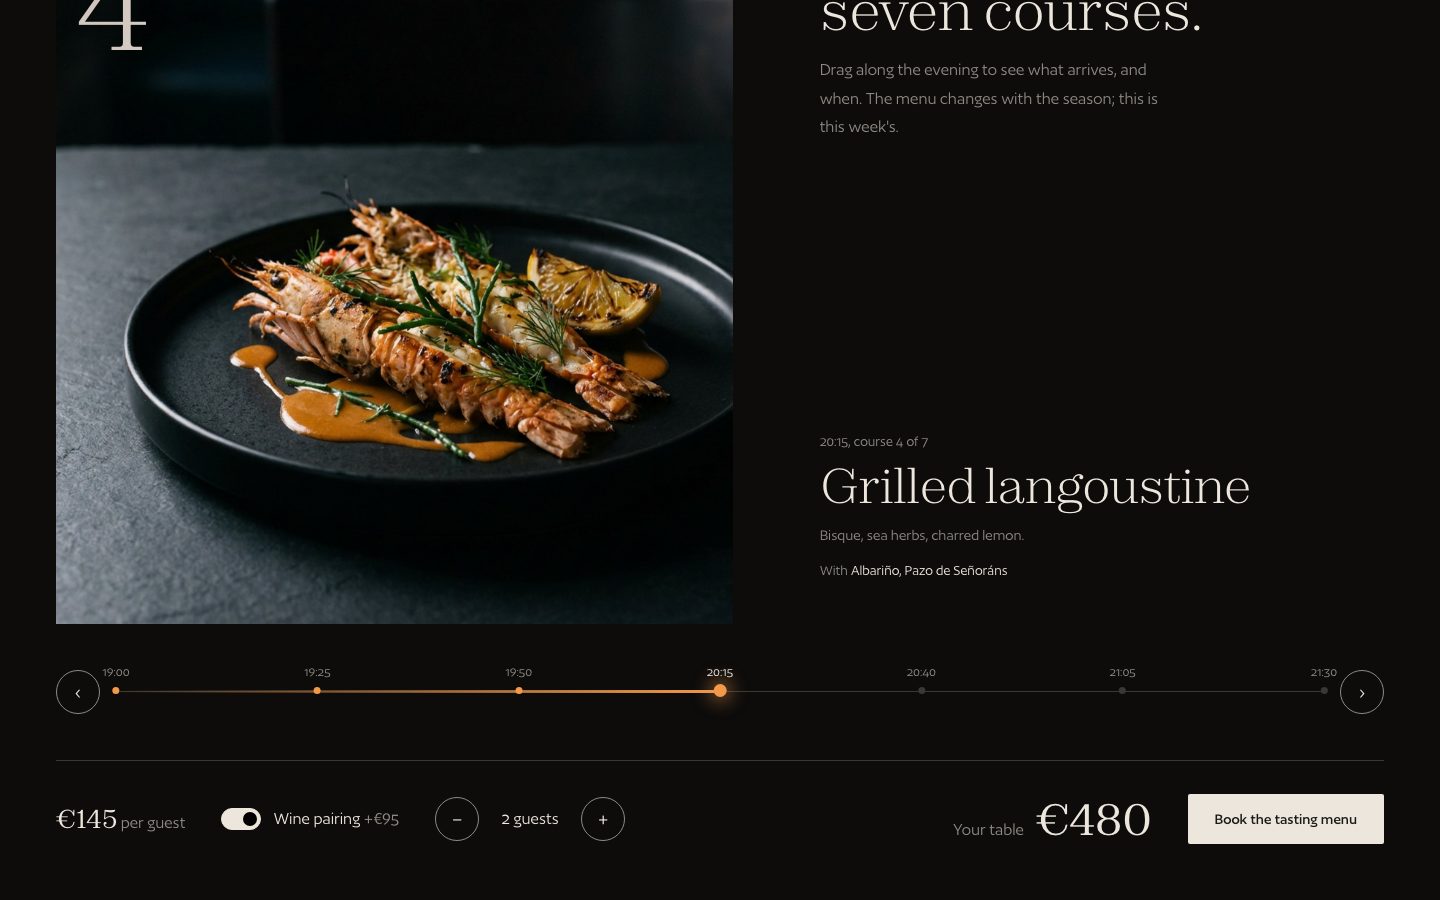
Locations and "open now"
In the Locations section, add one item per location: name, text, photo, street, city, phone, email and Time zone (for example Europe/London; look yours up at time.is). The name must match the location column in your Hours tab. Turn on Map for a Google map.
"Open now, until 23:00" in the header, hero and booking band is calculated in the restaurant's time zone, so it is right for a visitor anywhere in the world. Set which location it uses in each section's Location field.
Table requests by email
The Reservation, Event Enquiry and Gift Voucher forms send their requests to your inbox through Web3Forms (free).
- Go to web3forms.com, enter the email where you want requests, and copy the access key they send you.
- Paste it in the settings script:
web3formsKey: "your-key". Publish. - Send yourself a test request from the live site.
The Reservation form only offers days you're open and times while the kitchen takes orders: set Every (15 minutes), Last table (minutes before closing), Same-day notice and Days ahead. It's a request: you confirm each table by email or phone, so it works with any booking book.
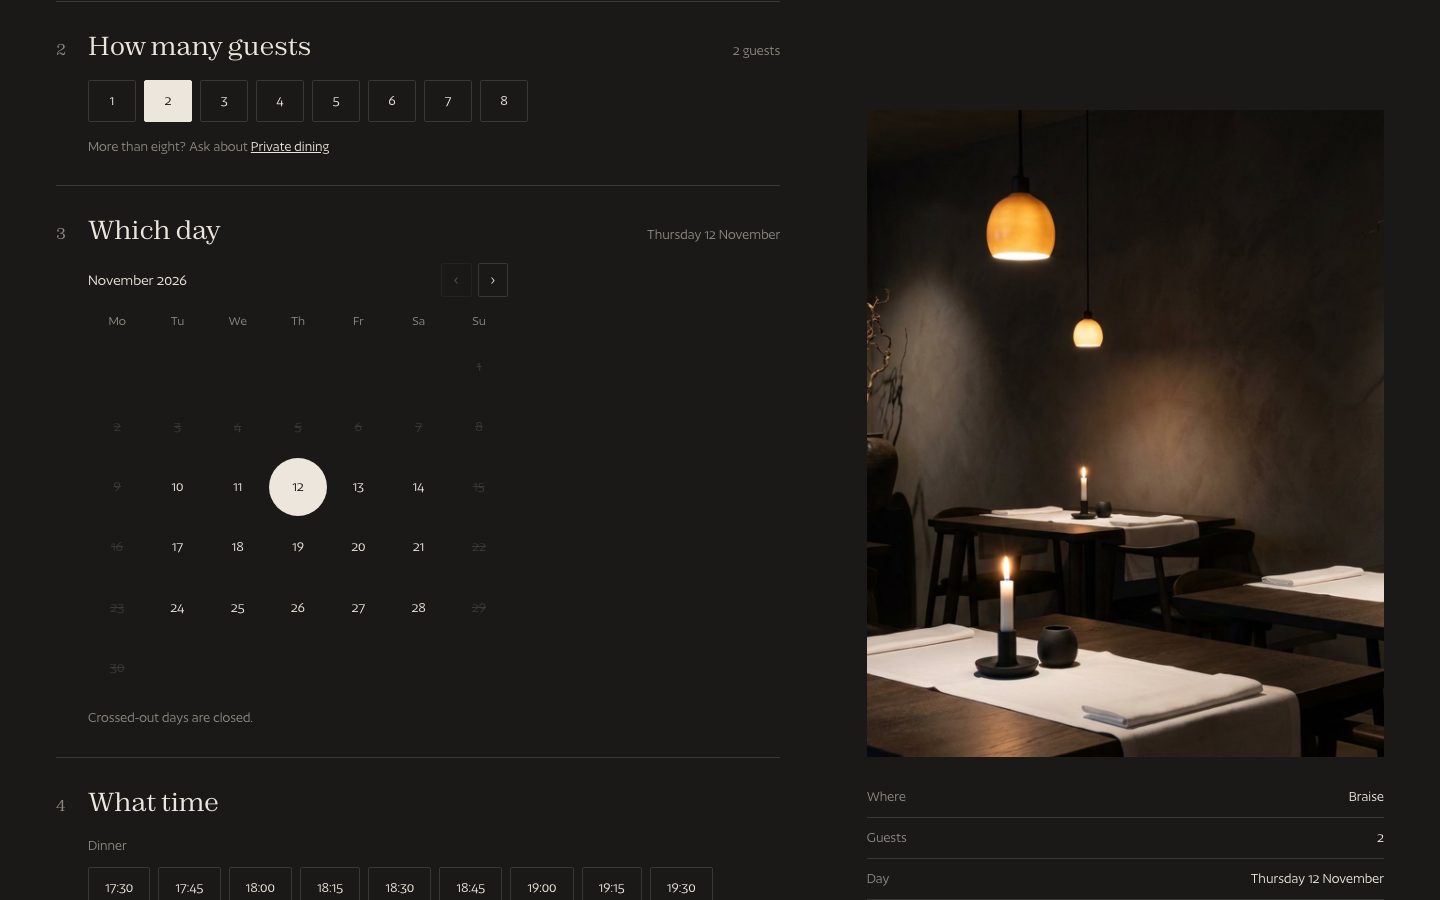
Private dining and events
In the Event Enquiry section, add your rooms with photo, minimum and maximum guests and minimum spend. Guests pick a room, set guests and budget, and the form tells them if the group fits and whether the estimate reaches the minimum spend, before they send.
Gift vouchers
The Gift Voucher section lets guests build a voucher and see it change live: an amount or an experience, a name and a message. Set Amounts and Experiences (one per line: Name | Price). The request reaches you by email and you reply with a payment link (Stripe, your bank, a voucher service), so no shop setup is needed.
Framer's AI agent
Braise is an Agent Template. It includes instructions for Framer's built-in agent (Settings > Skills): the design rules are always applied, /menu-and-hours explains what changes in the sheet and what in Framer, and /new-page builds new pages from the template's sections. The Design System page (Pages > Design) shows every colour, type size, button and section.
Write requests in plain words, for example "Add a page for our wine bar with a photo, a short text and the FAQ".
SEO and Google
- Settings > General: site title, description, favicon and social image.
- Settings > Pages: a title and description for each page.
- After publishing on your domain, add it to Google Search Console and submit
/sitemap.xml. Keep your Google Business Profile hours the same as your sheet.
Legal pages
Privacy, Cookies and Terms contain sample text. Replace it with your own (or your lawyer's) before you launch. The demo site sets no tracking cookies; if you add analytics or a booking widget, list their cookies.
Publish on your own domain
- Choose a Framer site plan for the project (needed for a custom domain and to remove the Framer badge).
- Settings > Domains > add your domain and follow the DNS steps for your registrar.
- Publish. The site is live on your domain once DNS updates (minutes to a few hours).
Launch checklist
- Menu and Hours links in the settings script; prices and allergens checked.
- Time zone and currency set; "open now" correct at your restaurant.
- Web3Forms key added and one test request received.
- Name, logo, colours; demo photos replaced.
- Addresses, phones and emails in Locations, Footer and Call To Action ("Call us" link).
- Tasting menu prices, rooms and minimum spends, voucher amounts.
- Legal pages replaced; SEO titles and social image set.
- Checked on a phone; published on your domain.
Troubleshooting
The site still shows the demo menu
Check that the link is between the quotes in the settings script, that the tab is published as CSV (not as a web page), and that you published the site. The editor canvas always shows the demo menu.
"Open now" is wrong
Check timeZone in the settings script, the location name in the Hours tab and in the section's Location field, and that times are written as 17:30.
No times in the booking form
The day has no hours in the sheet, or Last table is longer than the service. A 17:30–23:00 service with Last table 120 offers 17:30 to 21:00.
A dish is missing
Every row needs a name, and available must not be "no". Check the column names in the first row.
The form says "This is the demo"
The Web3Forms key is missing from the settings script, or the site was not published after adding it.
Support, licence and updates
Support
Email fiddweb@gmail.com. We answer within 48 hours on working days. Tell us which page and which device, and add a screenshot if you can. We help with everything in the template. For Framer itself (account, billing, domains) Framer's own support is faster.
Licence
One purchase covers one website, for yourself or for one client. You may change the template freely. You may not resell, share or redistribute the template or the remix link, alone or as part of another template.
Updates
Updates are free. When we improve Braise, we email you. A remix is a copy, so your project does not change by itself: to use an update, open the remix link again and copy the parts you want into your project.
No section matches your search.